Monday, September 9, 2019

Chef Rosie and the fruits of summer....life is Peachy!

     So Miss Michelle's birthday month is August, and I was such a good friend I said to her "Hey Michelle....you pick the dessert this month." And I was both surprised and shocked when she picked something as simplistic and delicious as a Peach Cobbler. And I had every intention to bake it in August. I truly did....and yet I didn't. The Texas summer heat made me lazy and scatter-brained. We had my husband's birthday celebration to acknowledge and my husband was in the process of getting out of the military....and physical therapy sucked the life out of me. September rolled in with stifling hot days and cooler evenings...and hitting the farmers markets at full speed. It also made me realize I never made the dang peach cobbler. Putting myself to task, I decided this past Sunday I would make the cobbler and instead of sharing it with the dessert squad (ssshhhh don't tell them they didn't get any.) 

     Cobbler is a southern staple and comes in so many different varieties. I love me a peach cobbler. I love me a chocolate cobbler. I love it with vanilla ice cream...or just fresh whipped cream. And of course....being the baker extraordinaire that I am.....I love to make things 'fancy'. Which means when I decided to bake the peach cobbler yesterday for my friends bible group....I needed to be 'extra' and decided to make a PEACH RASPBERRY COBBLER. Because that's how I roll. I also know how the bible group loves their dessert, so I opted to double up the recipe. You'll see towards the end of this entry, even a double batch wasn't enough!
Fruits of Summer
When picking your fruit especially berries, make sure there is no or little moisture in the packaging as that can grow mold. Also firm berries are great for decoration but ripe berries are fine if your baking them in to your dessert. Slice up your peaches and don't worry if they're not all the same size. Baking secret....it's going to be delicious regardless of slicing or cubing a peach for the cobbler. I decided to use 2 cups (16 ounces) of peaches and a cup and a half of raspberries (12 ounces). You always want your sweet fruit to outweigh the tarter fruit. But let me tell ya, peaches and raspberries go together like PB&J!


Cobbler pretty much  is dump all your ingredients in to a bowl and then whisk away because nobody wants a lumpy batter. In the bowl went melted butter, granulated sugar, I threw in a secret ingredient, and your flour. Next pour in your milk....and wanna know something? If you are vegan or lactose intolerant just swap out your vegan butter and soy milk for the real butter and whole milk that the recipe calls for. However for this cobbler I used all real ingredients.
                                          Look ma.....no lumps!


How you place your fruit makes no difference. Granted you want it spread out, and somewhat evenly spaced. But honestly this is not the recipe to be artistic or worry about a design when dropping in your fruit. Unless you're Chef Rosie and in a 'feeling extra' kind of mood, and got silly with her fruit placement. (Don't ask.....just know that yesterday was a 'be extra' kind of day.)
First you put a little

 First I tossed in the peaches, and each row I rotated
the direction of the peaches. Lining them up with the curves facing one direction, then the next row the curves faced the opposite direction. Then I plunked in the raspberries (yes plunk is the professional term) around the peaches. Then I zig-zagged the peaches on top of the raspberries. Then I plopped in more berries (yes another professional term). And then finally the last of the peaches....becuse that was how I was rolling yesterday....asy it with me......I was extra.
Then you add alot


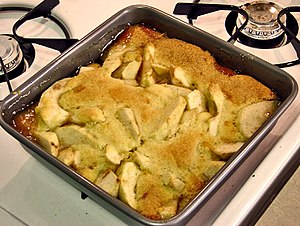
I would like to say that after it baked off and I brought it to my friends house that I was diligent in taking a photo of the completed dessert. I'd like to have thought that people weren't that ravenous and just attacked my Peach Raspberry Cobbler. But apparently bible study is serious work and people get super hungry. All I know is that people started making comments like "Oh this is delicious", and "oh my stars, Rose did a great job"...before I realized wheat was going on. The cobbler was under attack and being well....gobbled up! By the time I got over to my pan to take a photo of this dessert....this was all that was left:

 So.........yeah.....I would have to say this dessert was a success....and I will continue to make this one both for business and personal consumption. Go ahead....give it a spin. There is no wrong or right way to cobbler. But I promise you....if after baking this....your clothes start getting snugger....it's not my fault.

xo
Chef Rosie

P.S......September's challenge is bringing to bark to the table!

Friday, August 23, 2019

Michelle's Peachy Adventures

Sounds like quite the good time, right?  One of my most favorite things about this whole project with Rose is that I prefer to do my baking over at my parent's house so I don't have the dessert sitting around my house tempting me.  I get to spend my time, baking and experimenting with my mom and it is the best time.

My pick for this month is my most favorite dessert, peach cobbler.  We ended up using a family recipe for the cobbler today and I was excited to get to use a recipe out of that little recipe box of my mom's.


Who doesn't love a nice peach? We couldn't help but sample a few slices as I got them ready for the cobbler.   My mom had never left the peel on her peach cobbler before so she was a little unsure about me doing that, but it turned out just fine.  So if you are wondering, leave the peel on!! (Family friend that was over today Googled it because she was curious and Google said yes, leave the peel on.)


I got everything prepped and had to resist eating some more of those peaches. I did burn my pinky finger with splattering butter when I was dumping the peaches in the pie dish.  Ouch!  


Looking good.  At this point, I would have been happy with some sugar and a spoon and to just eat the peaches like that. (Confession time...I am not a huge fan of baking. I get bored really quick with it.  And trying to diet is not beneficial having this temptation all the time.  I challenged myself to learn new culinary skills so I take each challenge and do it happily once a month, but I probably wouldn't do it on a rainy day just because I was bored.)


Into the oven it goes.  I have to confess the funniest part of today was that some of the cobbler bubbled over the side and started to smoke. You would have thought there was something more substantial in the oven than that small pie dish of cobbler. We had the doors open, fans going, and crying from the smoke.  But we were laughing just as hard over it, burning eyes and all.  (Side note...Sweet Bo the Lhasa Apso eyed the smoke and was out the back door in a flash, I'm sure preparing for the cursed smoke detector going off.  Spoiler alert: It never went off.)


Ta-Da!!! All done and smelling like peaches and cinnamon up in here!  We left it to cool on the counter and ran an errand, knowing we were in for a treat when we got back home!


A nice scoop of vanilla ice cream and some warm peach cobbler...it was a tasty ending to the August baking challenge.  I loved it and loved that I got to share my day with my mom, baking. 

Are you a cobbler fan?  What kind is your favorite? Sound off in the comments!


Saturday, August 17, 2019

Peach Cobbler, the Queen's requested dessert

It's me, friends.

I'm the Queen.


It is my birthday month and this Leo claims that she is Queen of August.  And peach cobbler is my most favorite dessert.   I had originally thought about how to tie my fave Marvel or Star Wars characters to the cobbler, but decided it just needed to be put out there that this is my birthday dessert request.  (Though if you want to comment with pictures of Tom Hiddleston, Sebastian Stan, or Harrison Ford I won't complain too loudly.)

I was reading up on cobbler to talk about it a little and over on Wikipedia and have been grossed out seeing there is such a thing as tomato cobbler. (This picky lady doesn't do the tomato thing ever.  The texture squicks me out like no other.)   The variations of cobbler also are amusing:  Betty, grunt, slump, buckle, sonker, boot.  I don't know that I would happily be able to eat grunt, slump, or sonker. 

Apple cobbler.jpg

There are so many variations of how to make cobbler, but it is such an easy dessert to make.  I have absolutely NO doubt that both Rose and myself are going to knock this baby out of the park.  I don't know if there is really any way to make it fancy, but we will see how it goes.

Stay tuned...The August Bake It or Fake It is incoming...


Thursday, August 1, 2019

Michelle and the Captain America Cupcake Challenge.

Thanks to Rose for reminding me that I completely forgot to post to the blog after baking the other day.

So the July challenge of the month was to make Captain America Chocolate Chip Cookie Dough Cupcakes and I'm 100% Team Cap so you know that I was all the way on board with this one. 

The recipe is courtesy of All Recipes, Chocolate Chip Cookie Dough Cupcakes, and was pretty simple to make. I made the chocolate chip cookie dough from a family recipe on Sunday and left them to freeze until Friday when I made the cupcakes.  I definitely agree that you need to make sure to freeze your cookie dough balls or you are going to have dry, nasty cookies in the middle of a delicious cupcake.


Aren't they pretty?

The frosting was a chocolate buttercream and is a recipe that came from my Mom.  Everyone in my family had a cupcake and raved about them and how much they really liked the cookie in the middle of it.  A family friend said that it was just perfect mix of the two, not too much cookie or cupcake.  I gave the last two cupcakes to my co-host with Pop Culture Junkees Podcast and she shared with her brother, they both loved it!  YAY!! I love hearing that. 


It was a fun baking challenge for the month and I would probably take on baking these yummy goodies again.  

I did see someone advise to not push the chocolate chip cookie dough ball down into the cupcake, instead just letting it rest on the top of the cupcake batter and let it settle on it's own.  Trust me, they are speaking the truth.  I did push one down, just because I wasn't sure if it was too much batter for the cookie dough.  That cupcake caved in slightly.   My mom and I joked about it, she finally took one for the team and ate it herself.  Go, Mom, Go!!


Let us know if you make these cupcakes and how they turned out for you.  We love feedback from our followers if they are trying out the recipes that we are doing ourselves. 

Til next month, Happy Baking!! 


Monday, July 22, 2019

Chef Rosie's July Entry for 'Captain' America's Chocolate Chip Cookie Dough Cupcakes

     Another month...another dessert to take on...another reason for my 'dessert squad' to assemble. And literally, right now my flurkin Cro`i is trying to once again take command of my laptop. I think she may have a secret connection to Nick Fury, but she isn't giving up any details. Ok, so this isn't a new recipe to me...as about a year ago I had made them for other people and they were pretty darn good. In my old age however, I don't remember if I did use a cake mix per the recipe or if I decided to take on the recipe and make it completely from scratch. **HOWEVER** for the challenge, once again I built it from scratch and went with Gluten-Free flour as one of my dessert squad members is gluten intolerant. Although these cupcakes are super easy to make...they do require time as the filling needs to be frozen before baking off the cupcakes. I think we can all be patient....right?
                                                                                                                                                                                                                                                                                                                                                                                                                                                                                                                                                                                                              So in my intro post to this months challenge, I had talked about the lovely lady who accidentally invented chocolate chip cookies, and the year they actually became a 'thing'. 1938. Which again brings me to point out that although I had thought that chocolate chip cookies are America's favorite/ number one choice....they are not. It's the Oreo which take the number one slot, with chocolate chip cookies coming in at second place. But a chocolate chip just screams America right? And guess who else does....Steve Rogers....aka Captain America....aka Cap.  So who or what do you think came first....the chocolate chip cookie or Captain America?                    The answer may surprise you! According to Marvel comics, Steve Rogers was born on July 4, 1918. And Ruth Wakefield created the chocolate chip cookie in 1938! So Captain America is even 20 years older than America's second favorite cookie!!!

 
      I apologize, I nerded out for a minute, and got carried away in my research over cookies and Captain America. My Uncle Frank was all about intensive research, so I blame him for this trait of mine. My Uncle Frank also loved dessert and he was a soldier in the Korean War, so I think he's taking over this months blog entry....with wanting me to be thorough.


The first step in making these cupcakes was the filling which is a basic, yet altered cookie dough. Salt, butter, brown sugar, egg, granulated sugar and even some flour and chips. Mix until incorporated and use a cookie scooper to make balls and then freeze for several hours. (I like to freeze my balls for 24 hours.) The following day, I proceeded to make my yellow cake mix from scratch, and substituted all-purpose flour with Gluten-Free flour so my GF challenged friend could enjoy them as well. Once I filled my cupcake wrappers 2/3 of the way full, I plunked in the frozen chocolate chip cookie dough balls on top, and then baked them off...in my fancy-schmancy 24-cup cupcake pan.
 The recipe we used had a chocolate frosting to top these gorgeous duel dessert options. Because why choose between a chocolate chip cookie or a cupcake? Why not incorporate two desserts inn to one, and feel less guilty? If I make them again, I will make an edible chocolate chip cookie dough frosting (which yes, it is safe to eat not baked), and top them. But this time my dessert squad got the chocolate frosting version which I adorned with edible copper glitter. Yes, I am obsessed with edible glitter, I can't even lie. Everyone loved these babies, and the only complaint was from our friend Charles who loves to ride a motorcycle, that they had glitter on them. There always has to be one in the crowd...right??? Regardless of the frosting choice you go with....I think these chocolate chip cookie dough cupcakes will be a crowd pleaser. So what are you waiting for? Get baking, pull up a glass of milk, and enjoy any of the Captain America movies while eating a duel dessert of cupcake and cookie combined: 'Captain' America's Chocolate Chip Cookie Dough Cupcake!

xoxoxo Chef Rosie

Sunday, July 21, 2019

America's SECOND FAVORITE Cookie

     Do you know what America's favorite cookie is? I had thought I did, until I was ready to post this fun fact blog entry. Originally I had thought that Chocolate Chip Cookies were America's sweetheart. I mean lets face it....there's the debate as to which is better....chewy or crunchy...which chip melts better (Nestle, Hershey, or even Ghiradelli)...and is it safe to eat raw chocolate chip cookie dough. 
    All I know that in my household...my mother still requests me to make her chocolate chip cookies, over all the other recipes I can make for her. I have to fight my husband from dipping in to my mixing bowl and eating the raw dough, (And as a chef...I will tell you NO...it is not okay to eat a standard  raw dough or batter of any kind due to potential food-born illness risks.) 
     However, upon doing research for this intro to the Chocolate Chip Cookie Dough Cupcake challenge....I was educated in the fact that chocolate chip cookies are AMERICA'S SECOND FAVORITE COOKIE. THAT'S RIGHT...SECOND FAVORITE! It turns out that America's favorite cookie is Oreo. However here are some fun facts about  chocolate chip cookies to get you in the mind set for tonight's blog entry from Chef Rosie.


  • The chocolate chip cookie was accidentally invented in 1930 by Ruth Wakefield who ran a bed & breakfast with her husband Kenneth.

  • When Ruth's Chocolate Crunch Cookie recipe was featured on an episode of The Betty Crocker Cooking School of the Air radio program, the popularity of the humble chocolate chip cookie exploded and the cookie soon became a favorite all across America. The popularity of the cookie further increased after Ruth published the still popular, Toll House Tried And True Recipes, featuring the "Toll House Chocolate Crunch Cookie," in 1936.
    • Due to the enormous popularity of the cookie recipe, sales of NestlĂ© semi-sweet chocolate skyrocketed and Andrew NestlĂ© and the Wakefields struck a deal.

    To read the whole story about the invention of the chocolate chip cookie and Ruth Wakefields desalings with Nestle....click here:


    Stay sweet,
    Chef Rosie xoxo

    Friday, June 28, 2019

    Finally, Michelle has entered the race...

    Whew!!

    I don't know about you, but I was starting to sweat bullets about making this month's creation in time.  I was without a sink for two weeks.  If that wasn't a huge annoyance!! But as the Avengers said - Whatever it takes.  I assembled and am ready to roll out with my take on this months Bake - Natasha "Strawberry" Romanoff cake.


    I followed a recipe for this one and did fake it with a store bought mix because I'm not that skilled yet with making a cake from scratch.  (Okay, to be honest, I don't have the patience to make a cake from scratch unless I am in the mood for concentrated baking time.) 


    The cakes were from a simple box of Betty Crocker super moist white cake mix.  While the cakes cooled, I got the stabilizer cream going, which wasn't anywhere near as horrible as I thought it would be. The assembly of the cake was easy enough and was quickly done. I was baking from my mom's kitchen today and the main reason was because I didn't want to have that cake in my house, tempting me.  Sorry, Mom, it gets to be your temptation until it is gone.


    My one complaint with the recipe that I used today is that it only called for a pint of heavy cream for the stabilizer cream.  It wasn't enough so you can see bare spots in my cake as I was putting it together.  Definitely plan to double it up if I try it again and will find a use for any that is leftover elsewhere.

     My parents, sister, and myself were the taste testers for this baking experiment today.  All four gave a thumbs up.  My fifth taste tester hasn't had any cake as of the writing of this blog post so his vote is still outstanding. I also haven't told him what the ingredients are. I have a feeling he would say no when he heard the sour cream part. 


    I didn't let the strawberries dry thoroughly before dipping the ones on top in sour cream and brown sugar.  The sour cream started to slide off and the brown sugar lumped up.  Lesson learned for next time around - dry your fruit!!! 

    I have to admit when Rose said this is what she chose as her pick for our bake of this month I was more than skeptical about it.  I mean, strawberries, sour cream, and brown sugar???  Sounds kinda gross to me.  I was pleasantly surprised.  Who knew just eating a strawberry dipped in sour cream and brown sugar, by itself, would taste like strawberry shortcake?  It was really a surprise and I would definitely add this to a rotation of desserts to make.  Might be more apt to just do this minus the cake. 


    Overall, this was a fun bake.  I did a slight fake on it and have absolutely no regrets! I can't wait to see what the month of July is going to bring for Bake It or Fake It!  We're just getting started and guarantee you are going to be in for a great time with us.  

    Til next time, Happy Baking! 
    - xox -
    Michelle


    Wednesday, June 12, 2019

    Meet the Bakers: The incredible Chef Rosie

    We thought it would be fun for you to know a little about us so we are interviewing each other.
    Throughout the post, please enjoy some of the yummies that Rosie has created!


    Q: What inspired you to start baking?
    A: From when I was a little girl, my aunt and my mom always made a big fuss over the holidays and birthdays. Baking was something special, holiday cookies were a family event. Mom and my Aunt Ida would teach me, and then the three of us would decorate. There was never any criticizing my techniques or saying I couldn’t do something. Their brother, my Uncle Frank always would volunteer to be the taste tester…and sometimes we’d have to chase him out of the kitchen, to guarantee we’d have cookies for the holiday. So from when I was little, I loved baking, the sense of love and pride to give something that I made with my own two hands to someone I cared about. In regard to doing this ‘baking thing’ as a career, six years ago I suffered a traumatic injury, and decided to go back to school to fill up the hours of my day. A local college offered a culinary program, and I took it just for fun. I realized how much I still loved baking, and decided to turn it in to a career. In 2018 I graduated with my degree in Baking and Pastry Specialization, and have began my quest to Save The World One Baked Treat at a Time, working Farmers Markets, Pop-Up Events, and Baking To Order.


    Q: What particular bake are you most proud of?
    A: That’s a tough one. Prior to doing this as my business, I would say it was a cake I made for my mom’s birthday. She loves spicy stuff and chocolate. So I made her a tiered chocolate cake with chocolate fondant, and the top tier of the cake I added cayenne pepper. I decorated it with gold luster dust and stars.

    Professionally, I’d say the airbrushed galaxy cake or my watercolor cakes. Or themed cakes that my customers request for special occasions.


    Q: What has been your most epic baking fail?
    A: *Laughing at the memory*. Again, this was before I had become a professional. But I had made a tiered cake for a group I had belonged to. I didn’t know about using dowels or cake boards to stabilize the tiers. I just thought you staked the cake, and it sat pretty. I had to transport this cake about 30 minutes from the house, and my mom sat in the back seat holding it. The entire ride she kept saying ‘the cakes fine, just keep driving.’ Well by the time we got to the house where the party was, the tiers of the cake had slipped and slid, and looked like a topsy-turvy cake. ironically years later I ran in to Chef Duff Goldman and shared my story of this with him. He laughed and gave me a hug…and told me not to feel bad. That he’s had those moments himself, even doing this professionally. I always keep that in my mind…and I will always be thankful that Chef Duff turned an embarrassing moment in to a funny story to share.


    Q: What is your baking dream goal?
    A: My dream is to one day have a store front. I keep going back and forth between envisioning it strictly as a bakery with tables, chairs and coffee or a small café with some food items and of course all the baked items I can whip up.


    Q: What is your favorite thing to bake?
    A: I love to bake anything for my mom and my husband…. whatever they want I will attempt it. My mom loves a basic chocolate chip cookie which frustrates me as I think ‘really? you just want a chocolate chip cookie?’ But I love making Christmas cookies with her which one is an Italian Knot Cookie, the recipe being in our family for decades. No matter what year, how many cookie exchanges we do…that’s my mom’s go to…and I love making them with her. But on a professional level, I my favorite thing to bake is either cupcake cakes in the shape of a customers request…or even a fancy pastry or cake, like tiramisu cake…it is tests my skills and puts my degree to true use.


    Coming up next: Meet Miss Michelle

    Saturday, June 8, 2019

    Chef Rosie's June Submission for 'Natasha' Strawberry Romanoff Cake

         Hello there and welcome to June...welcome to Bake It or Fake It. Where Michelle and Chef Rosie take on a baked good each month and see  which of this dastardly duo can bake it and which one will fake it. I'm not going to lie....for Chef Rosie, the month of June is hopping. I had double-markets last weekend, and this weekend I have double markets again. In the grand scheme of things, I probably shouldn't have opted to have my dessert squad over tonight to take the 'Natasha' Strawberry Romanoff cake for a test drive tonight. Because even though my dessert squad is gone for the night....I have a flurkin that simply needs (not wants) to cuddle, Vegan Lemon-berry Loaf Cake to make for this weekends events, and packages of two different kinds of Cuppers to frost too. Oh yeah, pricing and labels. Yeah, a bakers job is never done...when she's trying to take over the world one baked treat at a time. 
         Wait. What's a dessert squad you're asking? Well since Michelle and I decided to create this blog...I needed people who would be taste-testers each month of said dessert.  Because who can eat a whole cake (my husband....sssshhhhh), but more importantly who would want to eat a whole cake (ssshhhh again, that would be my husband.) So I have recruited some local friends who would be willing to be part of my test kitchen, my guinea pigs if you will. But enough about them and what my weekend is like. You all want to get to the dessert, right?
         Without further ado, I bring to you 'Natasha' Strawberry Romanoff Cake: a spin on the classic strawberry and whipped cream dessert. 


    Top view of 'Natasha' Strawberry Romanoff Cake
         So the recipe that we are following this month called for a box mix. However I opted to make my cake from scratch, to keep it on a challenging level. I baked my cake the night before and opted to (Avengers) assemble it today. I won't lie, since graduating from college, I haven't had the need to make stabilized whipped cream (which was the frosting for the cake), and reading the instructions....I was a bit nervous. Especially since it was our first challenge! But DUDE!!! It was so easy!

    • OK, some tips and secrets from the pro to you all. You can cream your butter, sugar, and incorporate eggs and let your mixer run without worrying about compromising the texture of your cake. However once you add your flour and other dry ingredients...you do not want to over mix your batter as you will develop the gluten, and wind up with a tough, rubbery cake. And who wants that? Keep your batter light and fluffy!
    Getting your gelatin to the right consistency. Make sure it's gooey but 'gooey before you put it in the whipping cream and powder sugar mixture.
    Oh beautiful stabilized whipped cream. I can just eat you up with a spoon!

    Action photo of the batter being beat! Look ma....no lumps!
    • Next came the 'daunting task' of prepping the gelatin. When making a stabilized whipped frosting, you need something to hold your frosting together, that won't melt or lose structure over time. Enter GELATIN. Your gelatin is going to make your whipped cream frosting sturdy but not hard. Mind you, this cake also can't be sitting out in hundred degree Texas weather all day, otherwise it will melt like an ice cube in hell. The recipe does call for it to sit chilling in the refrigerator for several hours once it is assembled. So while your cake chills in the fridge, you can chill with a glass of wine or a good old gin and tonic. Now when you're working with the gelatin, you want to 'melt' it down to a liquid, pliable consistency...but you do not want to incorporate it in to your whipping cream/sugar mixture while it is hot, otherwise it will curdle the cream. You also don't want it to get cold and solid otherwise you'll have a lumpy whipped cream frosting. So timing is key! I also added cognac to my  whipped cream, to keep in tradition of a true Strawberry Romanoff (which uses cognac or orange liquor. )
    Like I mentioned earlier, I had made my cake from scratch, just because that's how I roll.  My stabilized whipped cream was  created, and the complicated part was to keep my husband from eating it before I could put the cake together.  When you make a cake with a gooey filling, you always want to do your border wall of frosting around the perimeter of the cake, to act as a wall. Make it high, and make it think. Because when you put that second layer of cake on top of your base or middle layer, it is going to spread. And trust me, you don't want it seeping out the sides of the cake as that makes the  final project look messy, not sit right, and can even mess with crumb and final coating of frosting.  I held my breath hoping this was the general rule when working with whipped cream frosting and fillings. Plus, being that Michelle and I were taking a leap of making a cake like this, wasn't sure if I would be the one 'faking it', and how would that look as the pro making a mess on her first blog?


    • With my stabilized whipped cream wall up, I spread my brown sugar/sour cream mixture on the cake and then topped that with strawberries, and sprinkled brown sugar on top. (Low and behold the sour cream/strawberry filling didn't bleed through my walls!)
    • Next came layer two with a repeat of walls, sour cream, strawberries, and a sprinkle of brown sugar. (Success! Again, no reason for crying with uneven layers, or filling bleeding through the sides!) I then topped off the second layer with with my third cake layer and gently pressed to make sure everything set flush and no issues. BEAUTIFUL!!!
    • The recipe that we chose did not call for a crumb coat of frosting, but I did one anyway, and let the cake set in the fridge for about 15 minutes. I then proceeded to apply my stabilized whipped cream frosting around the sides of my cake, and the top, and then proceeded to smooth the sides and top with my trusty bench scraper. I used a large star tip to make 5 swirls on top of the cake and placed strawberries in each swirl. I decided it needed a little 'extra' and sprinkled some red sanding sugar on top and called it a day. Placed it in the fridge to chill.

    My only creative criticism for myself was when I moved the cake from my turn table on to the cake stand, I broke off some of the border. I also made two small smushes towards the top on the sides. Yes....I am my own worst critic. There were eight of us last night that made up the dessert squad...including my husband and myself. I told them that they had to be brutally honest over what they thought of this dessert, and what they thought of it. They all 'ooohhed' and 'aaahhhed' over the final presentation.They each got a big piece as I got carried away, and made a 9-inch cake instead of an 8-inch cake. There was plenty of leftovers. The only person who did not love the cake was unbelievably my husband Jimmy. He said he loved the flavors, but he wasn't loving this in cake form. Our friend Charles said that it was almost like eating a strawberry shortcake. Chris ate some last night and the rest for breakfast today. He loved it. Nancy couldn't stop raving about it with each bite she took. Paula took ate hers and took some home for her husband and they both enjoyed it. And Archie and Debbie devoured theirs....and Archie isn't that much of a cake person. As for me. I enjoyed it. It wasn't my favorite, but then again I'm not a dessert or sweets eater. I just like making all this delicious stuff. If I want Strawberry Romanoff, I'll have the traditional. But in my professional opinion, I found this cake easy enough to make, even for a novice. Go ahead, and give it a try. I can't wait for Michelle to give it a try. Stay tuned....and Happy Baking! xoxo Chef Rosie